This part of the tutorial is going to dig into loading pre-set “maps” for our game. There are a huge number of ways we can do this, but this post I’m going to be focusing on loading game data out of an XML file using JavaScript. I’m doing this for a couple reasons: It makes it so you don’t have to have any server side code running for it and I really like playing with XML. I’ll be skimming over some of the pieces we’ve already covered in previous sections, but will have a link at the bottom to the complete JavaScript file.
The first thing that has to be decided before any real work can happen is what structure we want to use for the XML. I’m going down the path of KISS (Keep It Simple Stupid), and am going to try to keep it as simplistic as possible. At the most basic level we need the following pieces:
- Listing of the images / objects we use in the map
- Definition of what images / objects go where on the map
Hopefully it will be as easy as that. We’re going to place everything into the listing of objects: collidables, enemies, scenery and the player. This gives us the ability to fully control where everything shows up on the map when it initially loads. A simple map that is completely empty and places the player in the lower right hand corner would look like the following
1 | <object id="0" type="nothing" width="300" height="150"></object> <object id="P" type="player" width="32" height="32"></object> 00000000000000000000 00000000000000000000 00000000000000000000 00000000000000000000 00000000000000000000 00000000000000000000 00000000000000000000 00000000000000000000 00000000000000000000 00000000000000000000 00000000000000000000 0000000000000000000P |
Breaking down the XML is fairly simple. We have the objects node which contains the definition for all of the components that can be used on the map. In this case we have two objects: the “nothing” object lets the game know that it doesn’t have to draw anything and can just let the base canvas show through and the “player” object which is, not surprisingly, the player / hero. Since each grid for the map is a single character, I wanted to make sure we wouldn’t be restricted to only having 10 total objects per map (0-9). To that end I opted to make use of associative arrays within my JavaScript and use letters & numbers for the object id values. Granted, with a simple sprite game we probably won’t need more than 10 objects on a single map but better safe than sorry.
The next section of the XML is the Grid definition. It starts with four attributes: tileSize – the size of each grid square, width – how many tiles wide the map is, height – how many tiles high the map is, and baseColor – the base color to use for the map. The child nodes for the grid, called GridRows, are where we actually go through and place the objects onto the map grid.
To get started with using the XML we’re going to update our “load” method so that it reads in the XML and starts processing it. This requires changing our
1 | $(document).ready(function () |
:
1 2 3 4 5 6 | $(document).ready(function () { // Changed here to just load the XML, it causes the rest of the process // to continue once it is loaded into memory $.get("/data/SimpleGame_7.xml?ver=02_24_2012_1", processLoadGameData); }); |
We’ve basically yanked all of the programming goodness out of there and just have it load the XML. The [cciel_javascript]processLoadGameData[/cciel_javascript] function is equally simple and just saves out the returned XML and calls the function to actually start making use of it:
1 2 3 4 5 6 7 8 | function processLoadGameData(data) { // save out the response XML data into our global space savedData = data; // begin initializing the game grid and objects initGame(); } |
[cciel_javascript]initGame()[/cciel_javascript] is where we get to start digging in to the meat & potatoes of the work. It loads in the game board, sets up the canvas, crams the objects onto the game grid and then fires up the loop
1 2 3 4 5 6 7 8 9 10 11 12 13 14 15 16 17 18 19 20 21 | function initGame() { // Load in the base details for the game grid and base objects initGameBoard(); // Update the canvas based upon the values loaded from the XML setCanvasValues(); // Create the objects and place them onto the grid at the correct locations initGameTiles(); // Set up the fireball so that it is ready to go initFireball(); lastUpdate = Date.now(); // I set the game loop to be called at an interval // that is basically 1/2 of the desired framerate of 33 1/3 (30 FPS) // this seems to give the best performance to CPU usage ratio setInterval(gameLoop, 16); } |
I create several new variables at the top of the JavaScript to hold in the information that we’ll be loading out of the XML, they’re fairly self-explanatory based on the names, but I wanted to go ahead and put them up here before we started digging in to the code.
1 2 3 4 5 6 7 8 | // holds the integer size value of each tile in the grid var tileSize = null; // array to hold all of the unique game objects from the XML var gameObjects = null; // global variable to hold the XML data var savedData = null; // variable to hold the baseColor value for the gamegrid var baseColor = null; |
The first new function we’ll dig into is the [cciel_javascript]initGameBoard()[/cciel_javascript] one. It handles loading in the base game objects as well as preparing the base grid stats (tile size, height, width and color). We start off by doing a little prep work in case we’re in IE (it requires an extra property to let us query with XPath) and then do an XPath query to pull out all of the objects
1 2 3 4 5 6 7 8 9 10 11 12 13 14 15 16 17 18 19 | // if we're IE we have to do a little prep to be able to query with XPath if ($.browser.msie) { savedData.setProperty("SelectionLanguage", "XPath"); } var curItem = null; var tmpSpan = ""; var iter = null; // Load in object data using XPath if ($.browser.msie) { iter = savedData.selectNodes("/GameData/Objects/Object"); } else { iter = savedData.evaluate("/GameData/Objects/Object", savedData, null, XPathResult.ANY_TYPE, null); } |
At this point our iter object has the collection of nodes that matched our XPath query. The next thing we want to do is loop through each of the game objects defined in the XML and store them into our gameObjects array
1 2 3 4 5 6 7 8 9 10 11 12 13 14 15 16 17 | curItem = null; gameObjects = new Array(); for (var i = 0, curItem = (iter.length != null ? iter[i] : iter.iterateNext()); curItem; i++, curItem = (iter.length != null ? iter[i] : iter.iterateNext())) { // retrieve the associative array index "key" var index = curItem.attributes.getNamedItem("id").value; // create a new game object to hold the details gameObjects[index] = new gameObject(); // store the width of the game object gameObjects[index].width = parseInt(curItem.attributes.getNamedItem("width").value); // store the height of the game object gameObjects[index].height = parseInt(curItem.attributes.getNamedItem("height").value); // store the SRC link for the image for the game object gameObjects[index].imageSrc = curItem.attributes.getNamedItem("src").value; // store out what type of object this is gameObjects[index].type = curItem.attributes.getNamedItem("type").value; } |
This is a fairly simple loop that just loads the values out of the XML attributes for each of the bits and pieces we need. In the for loop we’re using the ternary operator ?: because of the differences in how IE and every other browser in the world returns XPath data.
Once we’ve loaded in all of the data surrounding the game objects, we load out the base information relating to the grid (tile size, base width, base height and color)
1 2 3 4 5 6 7 8 9 10 11 12 13 14 15 16 | //Load in grid data using XPath if ($.browser.msie) { iter = savedData.selectNodes("/GameData/Grid"); } else { iter = savedData.evaluate("/GameData/Grid", savedData, null, XPathResult.ANY_TYPE, null); } // There's only one Grid node, so we just grab it curItem = (iter.length != null ? iter[0] : iter.iterateNext()); tileSize = parseInt(curItem.attributes.getNamedItem("tileSize").value); baseW = parseInt(curItem.attributes.getNamedItem("width").value) * tileSize; baseH = parseInt(curItem.attributes.getNamedItem("height").value) * tileSize; baseColor = curItem.attributes.getNamedItem("baseColor").value; |
There’s not really much to explain in that one, it just loads the one Grid node out of the XML and then reads / stores the appropriate attribute values.
The next function is [cciel_javascript]setCanvasValues[/cciel_javascript] this function contains the same commands that used to be in the ready function so I’m not going to bother going back over that. Moving on!
The next function is where all the rainbows and puppy dogs are generated. [cciel_javascript]initGameTiles[/cciel_javascript] is the magical place that reads in all of the GridRows from the XML and creates the actual pieces of the game that will show up on the screen. It combines the XPath querying / looping we did above with the init type functions we had in previous versions to randomly generate rocks and enemies on the screen.
We begin, as you would expect, by querying the XML with XPath and starting to loop through the grid data. This time, however, we’ll be using a nested loop: an outer loop for each row in the XPath nodes and an inner loop to go through each “tile” for the row
1 2 3 4 5 6 7 8 9 10 11 12 13 14 15 16 17 18 19 20 21 22 | //Load in grid rows if ($.browser.msie) { iter = savedData.selectNodes("/GameData/Grid/GridRow"); } else { iter = savedData.evaluate("/GameData/Grid/GridRow", savedData, null, XPathResult.ANY_TYPE, null); } curItem = null; var collidableCount = 0; var enemyCount = 0; var sceneryCount = 0; for (var i = 0, curItem = (iter.length != null ? iter[i] : iter.iterateNext()); curItem; i++, curItem = (iter.length != null ? iter[i] : iter.iterateNext())) { var curRow = curItem.textContent; if (curRow === undefined) curRow = curItem.text; for (var j = 0; j < curRow.length; j++) { var objIndex = curRow[j]; |
As we loop through all the objects we use the associative array to determine what type of object has to be rendered to the screen for a given tile. The types we have:
- collidable: static object that has collision rules for enemies, players, fireballs
- scenery: static object that does not have collision rules
- player: hero object for the player on the grid
- enemy: hero object for the enemies on the grid
The steps for a collidable and a scenery object are almost identical except for the array into which they are stored
1 2 3 4 5 6 7 8 9 10 11 12 13 14 15 16 17 18 19 20 21 22 23 | if (gameObjects[objIndex].type == "collidable") { // Create a new static object collidables[collidableCount] = new staticObject(); // load in the width and height collidables[collidableCount].width = gameObjects[objIndex].width; collidables[collidableCount].height = gameObjects[objIndex].height; // position it based upon where we are in the grid collidables[collidableCount].x = j * tileSize; collidables[collidableCount].y = i * tileSize; // set up the image to use the value loaded from the XML collidables[collidableCount].image = new Image(); collidables[collidableCount].image.src = gameObjects[objIndex].imageSrc; // we are storing out the index of this object, to make sure we can // render it once it has loaded collidables[collidableCount].image.index = collidableCount; $(collidables[collidableCount].image).load(function () { collidables[this.index].render(); }); collidableCount++; } |
For scenery we just used the scenery array instead of the collidables array, but it is otherwise identical.
For the player piece we create a heroObject and just cram it onto the grid
1 2 3 4 5 6 7 8 9 10 11 12 13 14 15 16 17 | else if (gameObjects[objIndex].type == "player") { hero = new heroObject(); hero.width = gameObjects[objIndex].width; hero.height = gameObjects[objIndex].height; hero.x = j * tileSize; hero.y = i * tileSize; hero.image = new Image(); // set it's image to the proper src URL hero.image.src = gameObjects[objIndex].imageSrc; // once the image has completed loading, render it to the screen hero.image.onload = function () { hero.render(); }; } |
The enemy piece is exactly the same, except we load the heroObjects into the enemies array and have one additional line to set them moving in a “random” direction when they start
1 2 | // set the enemy to be moving a random direction at the start enemies[enemyCount].keys[0] = Math.floor(Math.random() * 4) + 37; |
And that’s really all there is to it for the new functionality. There are some other changes that were made to the JavaScript to clean things up (and I changed it from a [cciel_javascript]$(window).load[/cciel_javascript] to a [cciel_javascript]$(document).ready[/cciel_javascript] because a good friend was going to have an aneurysm about it ).
All of the other changes can be seen inside the JavaScript file itself.
The final XML used in this demo is located here
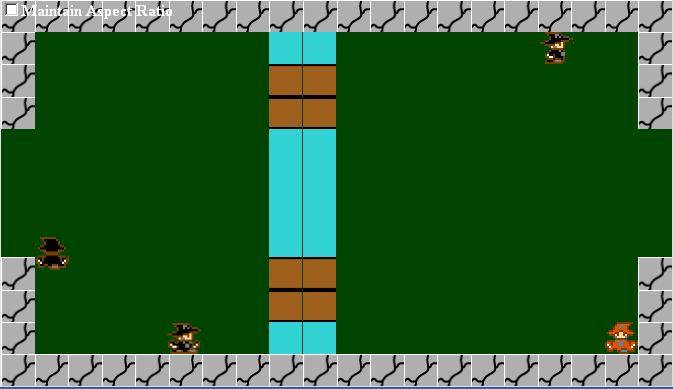
The end result with a sample XML file looks like this
And, as always, the link to the demo for this code